
Ultimate Beginner’s Guide to Hydroponic Farming
- Maximum Cultivator

- Nov 30, 2025
- 6 min read

1. Hydroponics 101: What It Is and Why It’s Better
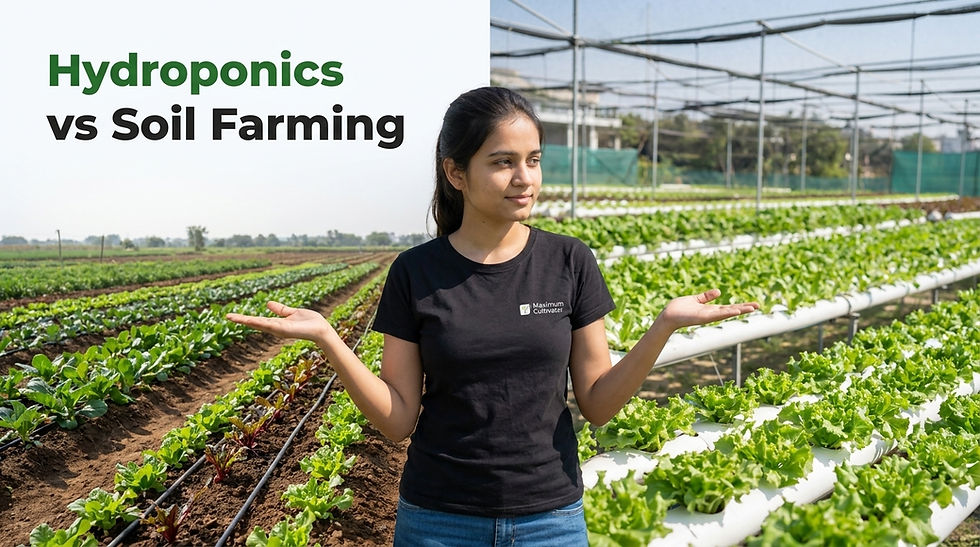
Hydroponics is simply growing plants in water instead of soil extension. In practice, roots are kept in a nutrient-rich solution (often suspended in inert media like rockwool or clay pellets) and supplied with oxygen – basically “soilless gardening” This offers big advantages over field farming. For example, hydroponic setups allow year-round production with no weeding or crop. They can recycle up to 90% of the water, since liquid solution is continuously reused. Plants also grow faster and closer together: growers often stack trays vertically, multiplying yield per square foot extension. In fact, studies show vertical farms using hydroponics can get 10–20× the yield per acre of open fields. These efficiencies make hydroponics more space- and resource-efficient than traditional soil farming.
Key advantages of hydroponics (vs. soil) include:
Year-round growing with no weeds or rotation needed
Huge water savings (often 90% less than field irrigation)
Higher yields in less space – plants can be densely planted or vertically stacked
Unlike conventional farming, hydroponics removes soil constraints. Vertical farming is a related concept that uses hydroponics: it grows crops in stacked indoor layers under controlled light. By combining hydroponics and vertical racks, growers achieve maximum output on minimal land
Learn More: Hydroponic courses and resources can help beginners master these ideas. For example, Maximum Cultivator’s online hydroponic courses (based in Hyderabad, India) teach modern soilless systems step-by-step https://www.maximumcultivator.com/hydroponic-courses
They offer a 90-day course covering all global methods maximumcultivator.com. Similarly, our hydroponic books and guides provide practical tips – “Grow Smarter with Our Hydroponic Books” – helping new growers from watering to harvesting maximumcultivator.com.

2. DIY Hydroponic Starter Systems: Step-by-Step Builds
Starting your first hydroponic garden at home can be cheap and simple. Here are easy DIY setups using common materials:
Deep Water Culture (DWC) Bucket: Fill an opaque 5-gallon bucket (or storage bin) with nutrient solution. Cut holes in the lid to suspend net-pots filled with a growing medium. The plant roots dangle directly into the water, which is kept oxygenated by an air pump and airstone.This floating raft method is one of the most beginner-friendly systems (once set up, it requires little tending).
Kratky Method: Similar to a DWC bucket, but no pump needed. Plants sit in net-pots on top of a nutrient reservoir, and as water is used up the roots develop an air gap. It’s entirely passive: “no additional inputs of water or nutrients are needed after the original application, and no electricity or pumps are required". In other words, fill a container with nutrient solution, place net-cups on top, and watch the gap form as the plant growsen This “simplest hydroponic system” is perfect for herbs and lettuces.
Basic NFT (Nutrient Film Technique): Use a long PVC gutter or vinyl channel as a growth trough. Cut holes on top for plants in net-pots. A small submersible pump circulates a thin film of nutrient solution through the pipe, just bathing the roots. Inexpensive pumps and tubing can be found at pet stores (aquarium pumps work). The trick is a gentle, continuous flow so roots get a constant nutrient/oxygem mix.

These setups can be made with buckets, PVC or gutters, pond pumps, and basic clay or coconut coir. Step-by-step: drill holes for net-pots, position an air pump (for DWC) or a small circulation pump (for NFT), mix a simple hydroponic fertilizer into water, and adjust pH. For detailed builds and troubleshooting, Maximum Cultivator’s courses and books give illustrated instructions – for example, we cover DIY DWC and NFT in our Modern Hydroponic Certificate Course
3. Best Hydroponic Systems for Beginners (Compare Options)
Not all hydroponic methods are equally easy. Here’s a quick rundown of common systems and which are best for newcomers:
Wick System (Passive): The simplest hydroponic setup. A cotton or nylon wick carries nutrient solution from a reservoir up into the plant’s growing medium. No pump or electricity is needed. Great for small herbs and leafy greens, but it can only supply a limited amount of water (so it’s low-maintenance but low-volume). Wick systems are often recommended as a first experiment.
Deep Water Culture (DWC): Very beginner-friendly. Plants float in an aerated nutrient tanken. Aside from adding an aquarium pump and air stone, there’s little to build. DWC buckets are forgiving and produce fast growth in leafy greens.
Ebb-and-Flow (Flood & Drain): Reliable for many crops. A timer-driven pump periodically floods a grow tray, then lets it drain back. It uses a substrate (like clay pebbles) to support plants. The wiki notes Ebb-and-Flow is “known for its simplicity, reliability of operation and low initial investment". Slightly more setup (timer, pump, reservoir) but still DIY-friendly once built.
Drip Irrigation: Uses a pump to drip nutrient solution onto each plant from above. Common in hobby farms. More complex (requires tubing and emitters), but good for larger varieties. It’s very scalable and forgiving since excess drips back or is recycled.
NFT (Nutrient Film): Highly productive (thin film of nutrients flows continually). However, it demands a stable setup and constant power, so a brief pump outage can stress plants. NFT excels with greens, but is trickier to DIY perfectly at first.
For a first project, many beginners pick Wick or DWC because they are pump-free (wick) or pump-low (DWC) and very low-tech. Ebb-and-flow is the next easiest step up. Drip and NFT give higher yields but require careful monitoring (pumps, flow rates). Ultimately, the best choice depends on space and goals, and our hydroponic training courses cover each system in depth maximumcultivator.com/hydroponic-courses

4. What to Grow First: Top Beginner Crops
The fastest, easiest crops for hydroponics are usually leafy greens and herbs. Good starter plants include:
Leafy greens: Lettuce (butterhead, romaine), spinach, kale, Swiss chard, arugula. These mature quickly (often 3–6 weeks) and thrive in water culture. In fact, studies note that lettuce (and basil) can grow nearly twice as fast in hydroponics than in soil Vertical farms almost always start with greens because they are high-yield
Herbs: Basil, mint, oregano, cilantro, chives, dill, etc. These aromatic plants have short cycles and do very well in small hydroponic setups. For example, basil and lettuce in hydroponics have been shown to double growth rate versus soil. Herbs also handle moisture fluctuations well.
Microgreens: Tiny young seedlings (e.g. radish, broccoli, mustard, pea shoots). These sprout and are harvested within 1–3 weeks. They don’t need deep roots and use very little solution – great for a quick success.
Easy fruits (bonus): Strawberries, cherry tomatoes, and peppers can be grown hydroponically. They take longer and need more light, but many beginners enjoy them. Tomatoes in particular are popular in courses, since small “micro-greens” or vine crops can prove hydroponic viability.
In general, start small and leafy. Our hydroponic books (like the 21 Crops Help Cards) list ideal parameters for each popular crop. For beginners, following proven guides – such as our Maximum Cultivator crop charts – is very helpful maximumcultivator.com. These resources walk you through nutrient schedules and planting densities for greens, herbs, and other top hydroponic vegetables.
5. pH, Nutrients, and Common Problems
In hydroponics, nutrient management is key. Unlike soil, water has no buffering, so you must monitor everything more closely. Here are the essentials:
pH: Always keep your solution slightly acidic, around pH 5.5–6.0. This range maximizes nutrient availability. (OSU Extension notes that nutrient solutions for soilless culture should be maintained between pH 5–6) Check pH regularly and adjust with pH-up/pH-down solutions. If pH drifts above ~6.5 or below ~5.0, plants can quickly lock out nutrients.
EC/TDS (Nutrient Strength): Measure electrical conductivity to know nutrient concentration. Recommended EC varies by crop (for example, lettuce ~1.2–1.8 mS/cm), but a beginner goal is roughly 0.8–2.0 mS/cm (500–1200 ppm) for leafy greens. Most problems like yellowing or stunted growth happen when EC is too high (burn) or too low (deficiency). Monitor with an EC meter and dilute or add nutrients to keep it stable.
Water Quality: Always start with clean water. Test your tap (pH and hardness) if possible. Hard water or high dissolved salts (Na, Ca, etc.) can throw off your nutrient balance. The Oklahoma State guide advises having water analyzed – impurities can cause “toxicity or deficiency problems”. If tap water is very alkaline or hard, consider using filtered or reverse-osmosis water for best results.
Solution Changes: Even with recirculating systems, replace your entire nutrient reservoir regularly. Mineral concentrations shift as plants take up nutrients and water evaporates. The OSU Extension recommends a full change roughly every 1–2 weeks (and topping off with plain water daily to replace what plants drink). Frequent refreshes prevent salt build-up and ensure balanced nutrition.
Common Symptoms: Yellow leaves often mean a specific nutrient deficiency (e.g. nitrogen or iron) or pH too high. Brown or black roots can signal low oxygen or root rot. Slow growth usually points to weak nutrient solution (low EC) or too little light. Many beginners correct issues by double-checking pH and fertilizer strength. Regular monitoring prevents “I wish I’d checked that” mistakes.
By following these guidelines, most problems are avoidable. Our Hydroponic Nutrient Cards and guides cover troubleshooting in depth. For example, our pH Ranges Card and EC Management Card explain exact levels and fixes for common issues https://www.maximumcultivator.com/hydroponic-books With a little care (and our courses/books to guide you), hydroponic newbies quickly learn to “dial in” perfect solution recipes.
Next Steps: Ready to grow? Check out Maximum Cultivator’s beginner hydroponic courses in Hyderabad (India) to get hands-on instruction https://www.maximumcultivator.com/hydroponic-courses We also offer practical hydroponic books and cheat sheets that teach you everything from basic setup to advanced tips maximumcultivator.com. Together, these resources will help you master hydroponic farming from day one.


Comments